data partition
${toc}
As a database grows in size due to frequent insertions, deletions, and updates, even straightforward SELECT queries can become slower. When a table grows to a point where it’s unwieldy, the overall size of the database increases significantly.
This is where table partitioning can be incredibly beneficial. Partitioning involves dividing a large table into smaller, more manageable pieces, each stored separately but still accessible as part of the larger table. This approach can greatly improve performance for queries, maintenance tasks, and can also make data management more efficient, particularly in large-scale database environments. By focusing on specific partitions rather than the entire table, operations can be executed more quickly and efficiently
from below the sow get tideup the size to point that its better to partition the table to be manage
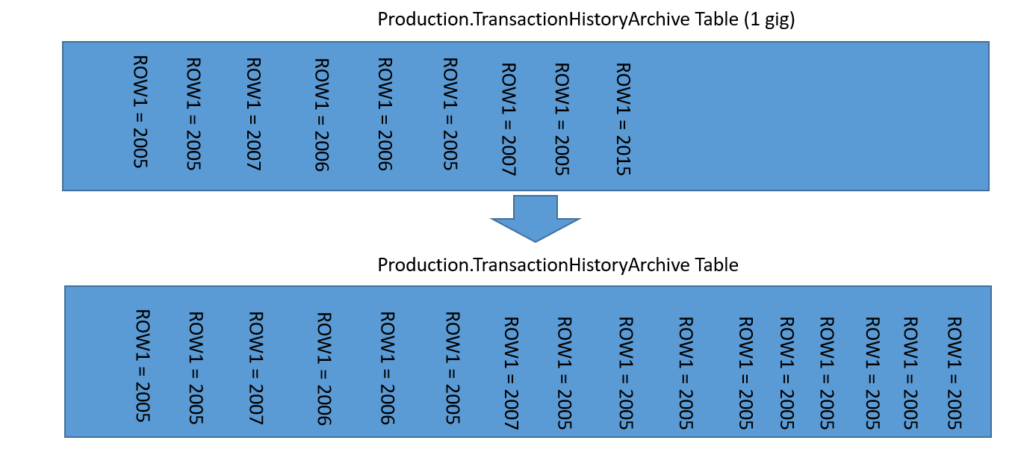
partition is only available on enterprise edition
table partition
below is the steps
- first create filegroup file group can be consider as container , when you first create database there will be default filegroup called PIMIRAY
creating filegroup will serve as container for other coming data to be stored in - determine how to partition the data in table , general specking its better to partition through the data the data got inserted . from the upove pic we dump data from 2007 got dump in filegroup 2007 , and so on .
- for better performance it better to create filegroup on separate disks .
- ensure you backup the database before you do such action
- determine how to partition
i will decide the table using date data got inserted
but first let see how many row is in the table
SELECT COUNT(*) AS Total_Rows FROM AdventureWorks2012.Production.TransactionHistoryArchive
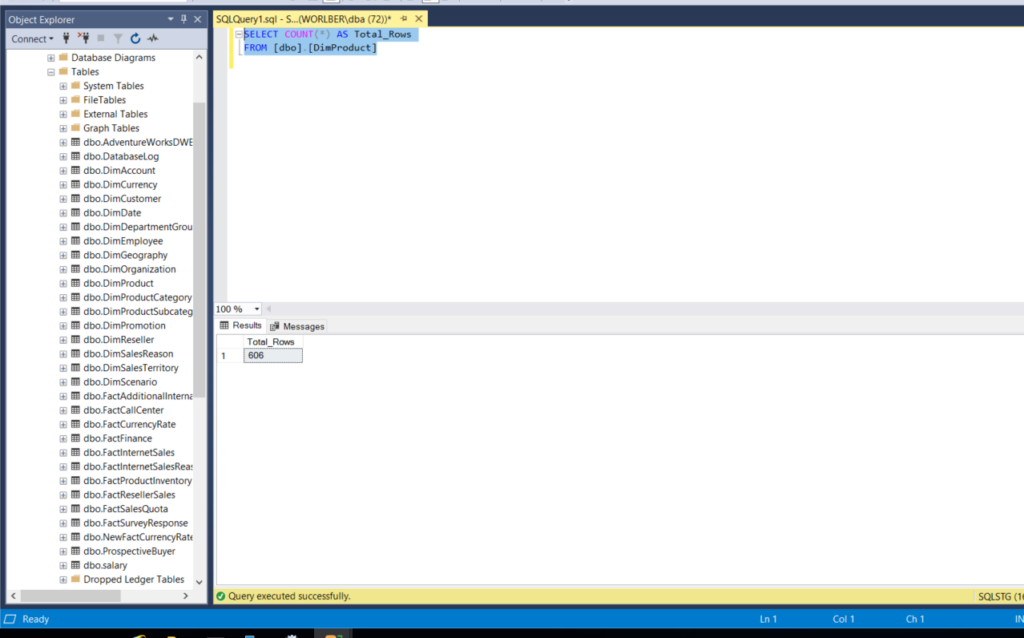
the number of row is very low no need to partition but just testing we will partition
in real wold you will only partition of you have 100000 row or more
now i want to calculate each row base on data it was inserted , or data in the row
SELECT DISTINCT YEAR(OrderDate) AS Year, COUNT(*) AS Total_Rows FROM [dbo].[FactInternetSales] GROUP BY YEAR(OrderDate) ORDER BY 1
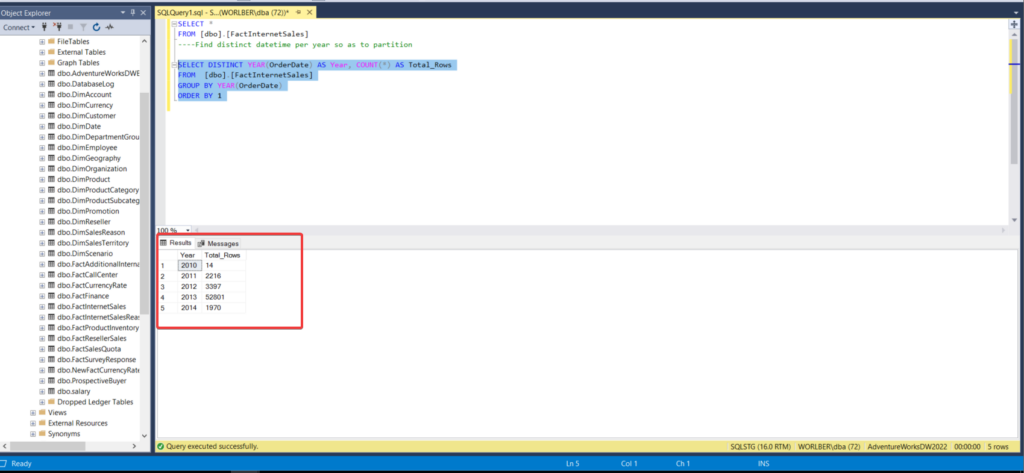
base on this now i can see i need 5 filegroup and i will dump according to the output of query
now i will create separate file group on sperate disk
after that crate file with extension .ndf
you need to use the below query
USE [master]
GO
ALTER DATABASE [AdventureWorks2012]
ADD FILE ( NAME = N'file-name',
FILENAME = N'full ndf file path ' ,
SIZE = 4096KB ,
FILEGROWTH = 1024KB )
TO FILEGROUP [filegroup-name]
GO```

```sql
USE [master]
GO
ALTER DATABASE [AdventureWorks2012]
ADD FILE ( NAME = N'TRANS2005',
FILENAME = N'C:\drive d\TRANS2005.ndf' ,
SIZE = 4096KB ,
FILEGROWTH = 1024KB )
TO FILEGROUP [DRIVE D]
GO

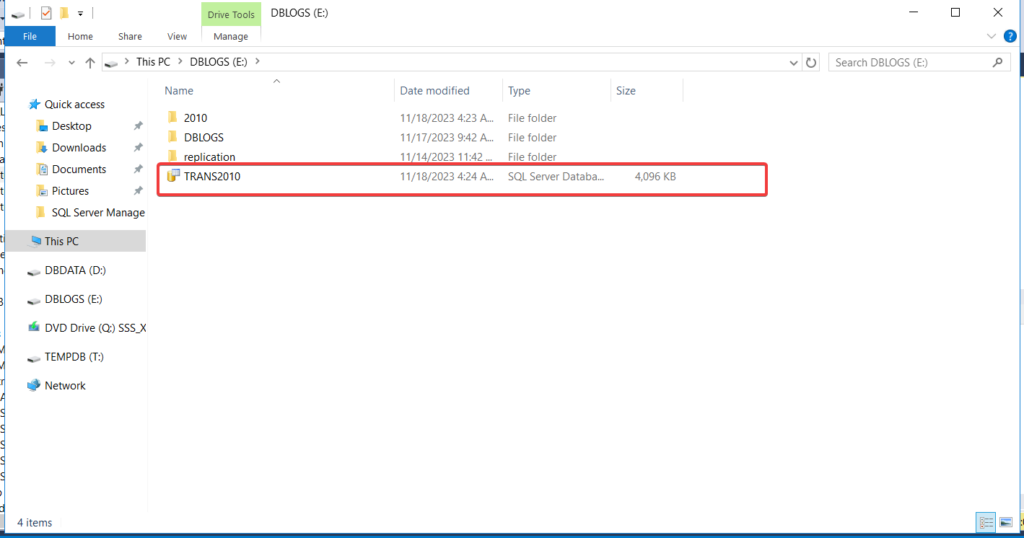
complete the same for remaining filegroup
note : you face error if the service account don’t have permission on drive , just adjust it and add service account with full control.

now i have create ndf file and associate it with its corresponded file group , and you will observed that there are some ndf file create on drive
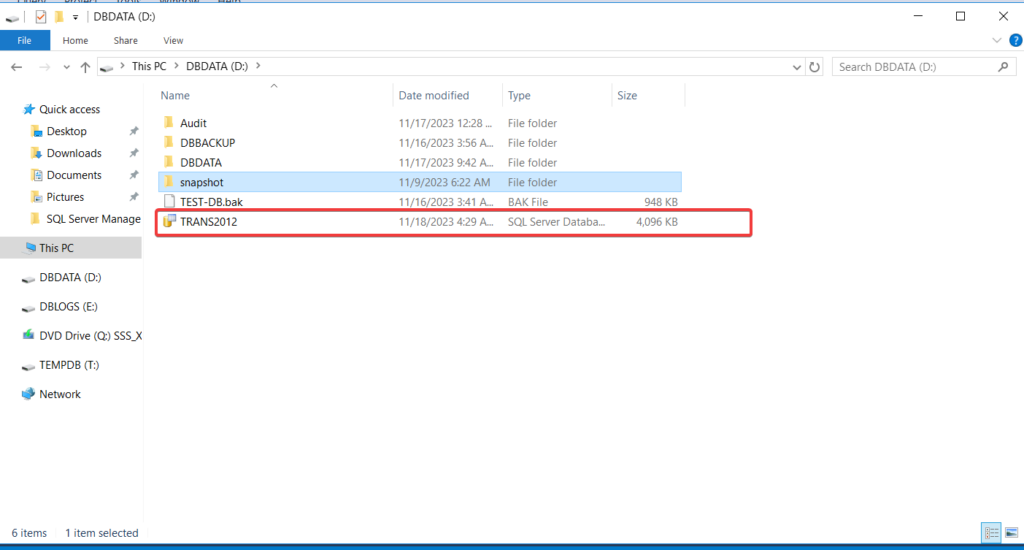
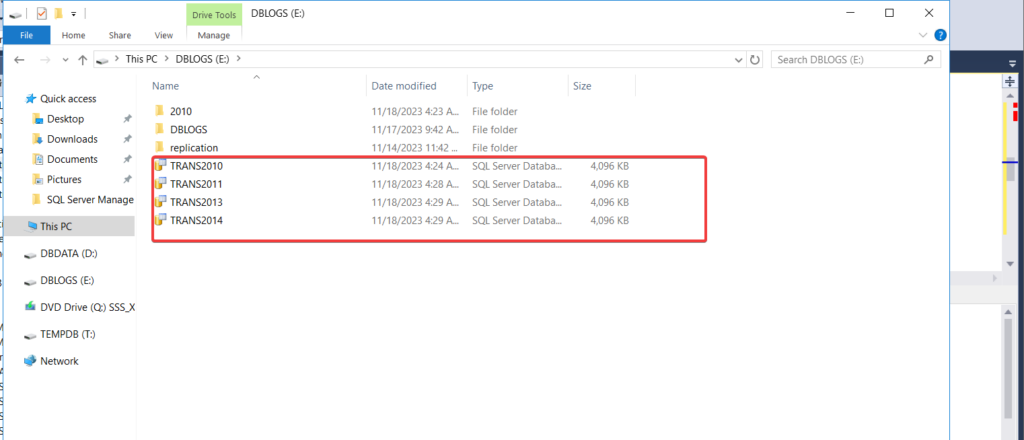
partition the data
now what is remining is to partition the data on filegroup using
Alright, here’s a way to organize your data in a database using a method called partitioning. Think of it like sorting your documents into folders for better organization. In this example, we’re going to create a ‘partition function’ called ‘FUNCTION_TRANSHISTORY’ to help us with this.
We’re going to use the transaction date to split the data. For instance, data from the year 2010 will go into one ‘folder,’ data from 2011 into another, and so on, up to 2014. We won’t consider the month in this case, just the year.
Here’s the process:
Start a transaction to make sure everything goes smoothly.
Create the ‘partition function’ named ‘FUNCTION_TRANSHISTORY’ and specify that we want to organize data based on the transaction date.
We set up ‘partitions’ for the years 2010, 2011, 2012, 2013, and 2014. These are like the folders where the data will be placed
BEGIN TRANSACTION

CREATE PARTITION FUNCTION [FUNCTION_TRANSHISTORY](datetime)
AS RANGE LEFT
FOR VALUES (N'2010', N'2011', N'2012',N'2013' , N'2014')
Suppose your table contains data with not only the year but also the month and time information, and you want to partition it accordingly. Partitioning is like categorizing your data into different groups for easier management.
In this case, we’re using the AdventureWorks2012 database as an example. Here’s what we’re doing:
- We begin by starting a transaction. This ensures that all the changes we make will be treated as a single unit, so if something goes wrong, we can easily roll back to the previous state.
- Next, we create a ‘partition function’ called ‘FUNCTION_TRANSHISTORY.’ This function is like a set of rules that tells the database how to split the data. We specify that we want to partition based on the ‘datetime’ values.
- Now, here’s the interesting part. We define the partition boundaries using specific datetime values. These values determine how the data will be divided. In this example, we’ve set up partitions for December 31st of 2005, 2006, and 2007, right down to the last millisecond of the day.
So, any data with a datetime value before December 31, 2005, will go into one partition, data before December 31, 2006, but after 2005, goes into the next partition, and so on.
USE [AdventureWorks2012]
GO

BEGIN TRANSACTION

CREATE PARTITION FUNCTION [FUNCTION_TRANSHISTORY](datetime)
AS RANGE LEFT
FOR VALUES (N'2005-12-31T23:59:59.997', N'2006-12-31T23:59:59.997', N'2007-12-31T23:59:59.997')
parttion sechema
then after you run the above query next you need to dump the row orginize in there to there filegroup
CREATE PARTITION SCHEME [SCHEMA_TRANSHISTORY]
AS PARTITION [FUNCTION_TRANSHISTORY]
TO ([2010], [2011], [2013], [2014])
full qurey
`BEGIN TRANSACTION
— Create a partition function with boundaries that match the file groups
CREATE PARTITION FUNCTION FUNCTION_TRANSHISTORY
AS RANGE LEFT
FOR VALUES (N’2010′, N’2011′, N’2012′, N’2013′, N’2014′)
— Create a partition scheme with file groups that match the partition boundaries
CREATE PARTITION SCHEME [SCHEMA_TRANSHISTORY]
AS PARTITION [FUNCTION_TRANSHISTORY]
TO ([2010], [2011], [2012], [2013], [2014] , [others])
— Commit the transaction
COMMIT TRANSACTION`
i had to create another filegroup because the function return more segment that number of filegroup i have
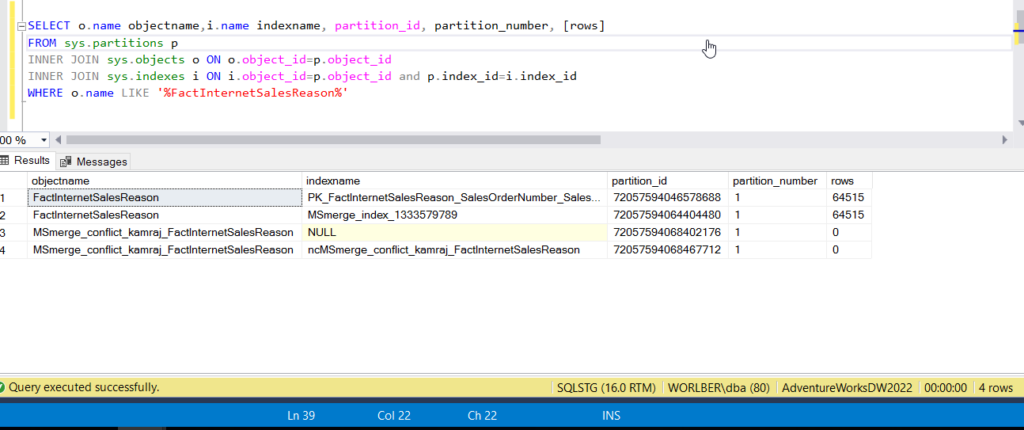
VERIFY
to verfiy use the below qurey
SELECT o.name objectname,i.name indexname, partition_id, partition_number, [rows]
FROM sys.partitions p
INNER JOIN sys.objects o ON o.object_id=p.object_id
INNER JOIN sys.indexes i ON i.object_id=p.object_id and p.index_id=i.index_id
WHERE o.name LIKE '%TransactionHistoryArchive%'
partition table through GUI
Right-click on the Table: Start by right-clicking on the table for which you want to create partitions in your SQL Server Management Studio (SSMS) or a similar database management tool.
1.Select “Object”: From the context menu that appears, choose “Object.” This is where you typically manage various aspects of the table.
- Choose “Storage”: Within the “Object” submenu, select “Storage.” This is where you’ll manage storage-related settings for the table.
- Create Partition: Look for an option or button that allows you to create partitions. It might be labeled as “Create Partition” or something similar. Click on it.

4. Select the Partitioning Column: The wizard will prompt you to choose the column that you want to use as the basis for partitioning. In your case, you mentioned that you’d like to use a column with dates. Select that column from the list provided.

- When you’re using the wizard, it will prompt you to give a name for something called a ‘partition function.’ Think of the partition function as a set of rules that tells the database how to split and organize your data. So, it’s like giving a name to these rules, which will guide the database on how to create partitions
- The wizard will also ask you to provide a name for something called a ‘partition scheme.’ Think of the partition scheme as a blueprint that helps the database know where to store each partition. So, giving it a name is like creating a plan for how these partitions will be organized
- When using the wizard, you’ll come across a step where you need to specify how data should be distributed among different file groups. This is like telling the database where to put each ‘batch’ of data.
To do this, you’ll define boundaries that determine which data goes where. For example, if you want all data from the year 2010 to go into a specific file group, you’d set the boundary to start on January 1, 2010 (2010-01-01) and end on December 31, 2010 (2010-12-31).
You can usually click on ‘Set Boundaries’ and specify these dates to make it clear to the database how to organize your data


- After you’ve configured the partitioning settings in the wizard, it will generate a script for you. This script is like a set of instructions that tells the database how to actually perform the data partitioning.
The wizard may also offer you the option to run this script at a later time, allowing you to schedule when you want the partitioning process to take place. It’s like setting a timer for when you want the data to be organized into partitions

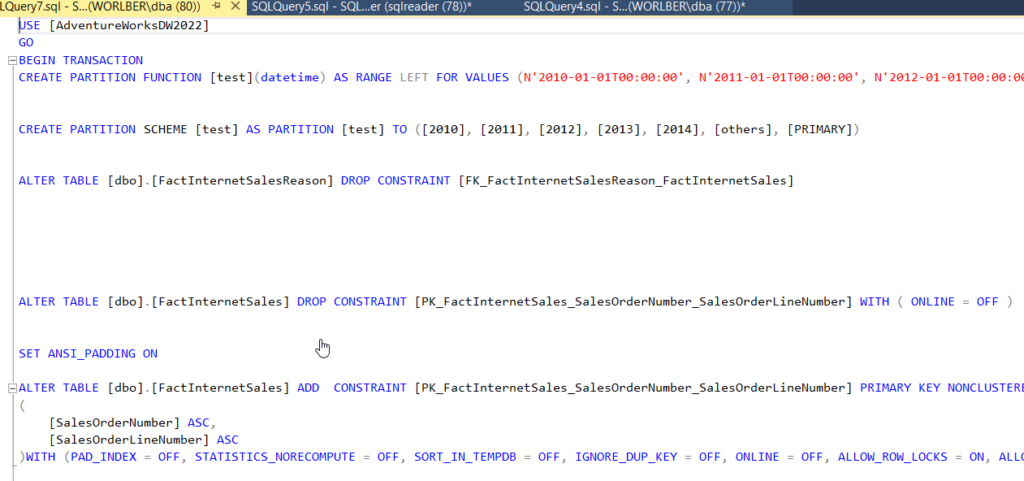
- now run the below command it will show the result to verify the data parttion
SELECT o.name objectname,i.name indexname, partition_id, partition_number, [rows]
FROM sys.partitions p
INNER JOIN sys.objects o ON o.object_id=p.object_id
INNER JOIN sys.indexes i ON i.object_id=p.object_id and p.index_id=i.index_id
WHERE o.name LIKE '%table_name_we_parttions%'
SELECT o.name objectname,i.name indexname, partition_id, partition_number, [rows]
FROM sys.partitions p
INNER JOIN sys.objects o ON o.object_id=p.object_id
INNER JOIN sys.indexes i ON i.object_id=p.object_id and p.index_id=i.index_id
WHERE o.name LIKE '%FactInternetSalesReason%'
